
The “Blue Glow” Illusion: Why Your Zapper Fails Before the Filament Breaks
Here is an ugly industry insider secret that cheap offshore trading companies won’t tell you: just because your bug zapper bulb continues to glow does not mean it is still killing bugs.
Standard fluorescent UV bulbs operate on an internal chemical reaction where mercury vapor excited by an electrical current hits an internal phosphor coating. This coating is engineered to emit ultraviolet light—specifically in the 365nm spectrum, which flying insects find irresistible. However, while the visible blue light can last for over 10,000 hours, the invisible UV-A output drops by up to 50% after roughly 3,000 to 5,000 hours of continuous field operations.
[Standard UV Bulb Degradation Timeline]
0 Hours: 100% UV-A (365nm) Output -> Maximum Attraction
1,500 Hours: ~85% UV-A Output -> Noticeable drop in high-humidity zones
3,000 Hours: ~60% UV-A Output -> Bulb glows bright blue; insects ignore it entirely
If your facility maintenance team only replaces zapper bulbs when they completely burn out or when the bulb doesn’t light up at all, you are running an expensive, ineffective nightlight. For high-throughput food processing plants or agricultural hubs, timing is everything. You should replace your bug zapper components every spring before the breeding season peaks, regardless of how bright that blue light looks to the human eye. Brands like DAJOORON design heavy-duty lamps with reinforced phosphors specifically to combat this rapid attenuation, making them a staple for procurement managers who cannot afford downtime.
Decoding the Technical Specs: G5 vs. G13, T5 vs. T8, and the Ballast Trap
Don’t send your sourcing specialist to an online marketplace to buy “15W light bulbs” blindly. Using the wrong bulb type will significantly impact bulb life, or worse, fry your internal ballast within 48 hours. Let’s break down the exact mechanical and electrical matrices you must identify from the old bulb etchings.
1. Form Factor and Tube Diameters (The “T” Nomenclature)
- T5 Bulbs: These feature a diameter of 5/8 of an inch. They are thinner, run hot, and are often used in compact commercial or modern residential zappers.
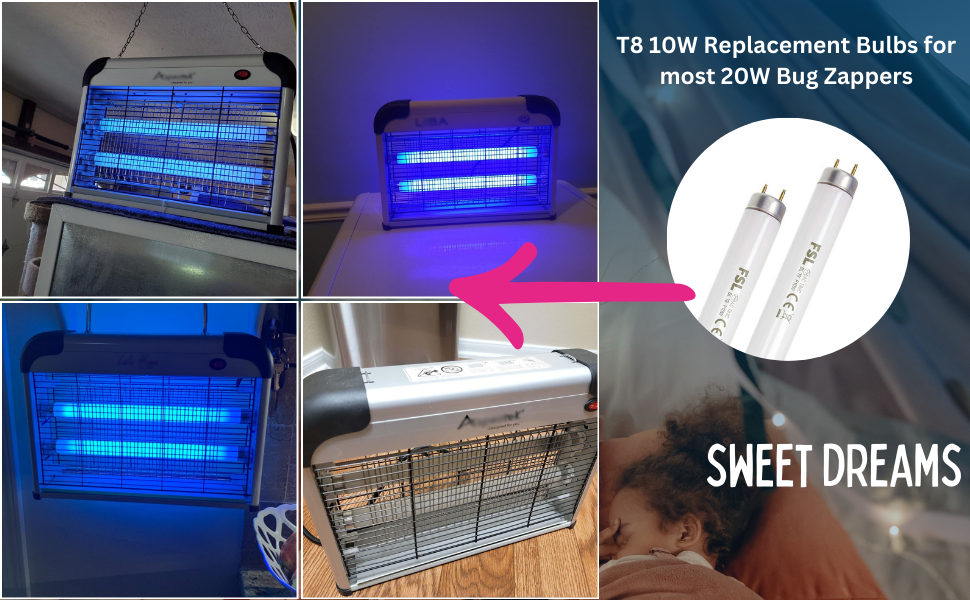
- T8 Bulbs: These measure 1 inch (8/8″) in diameter. They are the workhorses of industrial warehouse grids.
- Crucial Warning: A T5 bulb will not fit into a T8 socket, even if the lengths match, due to variations in the pin spacing.
2. Base Types and Pin Configurations
You must look at the end caps of the fluorescent tubes. If it’s a double-ended tube with two metal pins sticking out of each side, it is likely a bi-pin setup:
- Miniature Bi-Pin (G5 Base): Typically found on T5 lamps. Pin spacing is exactly 5mm.
- Medium Bi-Pin (G13 Base): The standard for T8 lamps. Pin spacing is 13mm.
- Single-Ended Plug-Ins (PL-S or compact configurations): Some zappers utilize a single base with a 2-pin or 4-pin push-and-click architecture (like the G23 base).
| Bulb Type Marker | Tube Diameter | Standard Base | Common Industrial Wattages | Target Pests Optimized |
| F15T8/BL | 1.0 Inch | G13 Medium Bi-pin | 15 Watts | House flies, Fruit flies, Blowflies |
| F4T5/BL | 0.625 Inch | G5 Mini Bi-pin | 4 Watts | Gnats, Mosquitoes (Midges) |
| PL-S 9W/BL | Compact Twin Tube | G23 Push-In Base | 9 Watts | Broad-spectrum warehouse pests |
When sourcing components for heavy-duty setups, matching the precise code (e.g., F15T8/BL vs BLB) is non-negotiable. Note that BL (Black Light) emits the faint blue plus UV light necessary for pest control system setups, whereas BLB (Black Light Blue) features a dark purple filter glass meant for currency validation or stage effects—insects find BLB far less attractive. Premium industrial options provided by manufacturers like DAJOORON prioritize true 365nm BL spectrum emission to guarantee high-strike volumes on the high-voltage grid.
Step-by-Step Bulb Replacement: The Factory-Floor Protocol
Safety should always come first. A commercial bug zapper carries a step-up transformer that juices the killing grid anywhere from 1,500V to over 4,000V. Even after disconnection from the wall outlet, the internal capacitors can retain a lethal electrical charge. Homeowners can handle basic swaps, but industrial facilities require strict adherence to standard lockout/tagout (LOTO) protocols.
Step 1: Isolation and Residual Discharge
- Unplug the unit completely from the power source.
- Gather your tools: an insulated screwdriver (rated for electrical work), clean work gloves, and your new correct replacement lamp.
- Look for screws or latches that secure the outer protective cage. Open it.
- Discharge the grid: Take the insulated screwdriver, holding only the plastic handle, and touch the metal shaft across two parallel wires of the inner electrified grid. If you hear a loud snap, that was residual stored energy. If you skip this, you are in for a violent shock.
Step 2: Extracting the Degraded Component
- For Bi-Pin Tubes (T5/T8): Gently rotate the old bulb 90 degrees counter-clockwise until the pins line up with the vertical slot in the socket. Slide it straight out.
- For Single-Ended Push-In Bulbs: Locate the retaining clip or plastic latches that secure the base. Depress them and pull the bulb horizontally out of its socket assembly. Do not pull by the glass glass-tubes—they are brittle, contain traces of mercury vapor, and will snap if uneven pressure is applied.
Step 3: Installing the High-Output Replacement Lamp
- Unpack your new bulb. Never handle the new bulb surfaces with bare hands. Oils from your skin leave a chemical residue on the quartz glass. When the zapper runs, these skin oils create hot spots that degrade the phosphor unevenly, causing premature tube cracking and drastically shortening your overall bulb life. Use clean cotton gloves or hold the tube by its plastic/metal end caps.
- Align the pins vertically with the socket track. Slide it in, then rotate it 90 degrees clockwise. You should feel a distinct mechanical click indicating that it is locked into place.
- Secure any internal retaining clips or structural support brackets.
Step 4: System Reassembly and Diagnostics
Close the protective wire grid cage and tighten all exterior housing screws. Restore line power. If you are using premium, high-stability components like those from DAJOORON, the lamp should strike immediately without excessive flickering at the ends of the tube.
Troubleshooting Common Post-Replacement Failures
Field Case Study: We once assisted a cross-border cold-storage warehouse that swapped out 200 zapper lamps, only for 40% of the units to fail within two weeks. The procurement team assumed they received a batch of bad bulbs. Our on-site electrical audit discovered that the units were built with old magnetic ballasts that were over-driving the modern, low-mercury fluorescent tubes, killing the filaments prematurely.
If your bulb doesn’t light up after installation, execute this diagnostic triage before throwing away the lamp:
[Post-Replacement Triage Flow]
Bulb is dead -> Check socket contact alignment -> Rotate 90° further
                 ↓ (Still dead)
Check for end-blackening -> Yes -> Filament blown by faulty ballast
                 ↓ (No blackening)
Test bulb in a known working unit -> Works -> Replace the fixture's ballast or starter
- Flickering at the Tube Ends: If a new bulb continues to flicker rapidly without fully striking, check if your fixture has an external starter (a small plastic cylinder typically located near the base). If the starter is degraded, it cannot jumpstart the gas ionization inside the tube. Replace the starter—it costs pennies and saves your expensive lamps.
- Immediate End-Blackening: If the ends of the new glass tube turn solid black within hours of installation, your fixture’s ballast is failing. A faulty ballast delivers unregulated current draw, cooking the cathodes instantly. No matter how many new light bulbs you throw into that machine, they will all burn out immediately until the ballast is replaced.
- Competing Light Sources: If the new bulb strikes perfectly but you notice a sudden drop in pest control efficiency, check the physical placement of the unit. If the factory floor team positioned the zapper directly under an industrial LED high-bay light, those competing light sources will drown out the 365nm UV signal. Zappers perform best in darker, strategic intercept points away from primary ambient illumination.
Industrial Maintenance FAQ
Q1: Can I replace my traditional fluorescent UV bug zapper bulb with an LED UV bulb?
A1: Forget about a simple drop-in swap unless you fancy a miniature electrical fire or a dead bulb within seconds. Fluorescent systems run on ballasts that pump a high-voltage spike to ionize gas. LED drivers want steady, low-voltage DC or direct line AC. Shoving a standard led uv bulbs layout into a live fluorescent ballast circuit is a kamikaze mission for the internal driver chips. If you want the longevity of LED, you have to open the chassis, rip out the ballast completely, and bypass the wiring directly to line voltage. If that sounds like too much downtime for your maintenance crew, stick to industrial-grade fluorescent tubes designed for heavy-duty cycling.
Q2: Why do some UV bulbs contain mercury, and how should our warehouse dispose of them?
A2: Without that tiny drop of mercury rolling around inside the tube, you don’t get the low-pressure plasma arc required to generate ultraviolet light waves in the first place. When electrons hit the vaporized mercury, it fires off raw UV energy that the phosphor coating converts into a bug-attracting 365nm glow. The trade-off is that these fluorescent bulbs are classified as hazardous waste under federal RCRA guidelines. Smashing them in a standard trash compactor creates a toxic vapor cloud and triggers hefty EPA fines for your facility. Toss them into certified lamp recycling boxes—like a RecyclePak setup—which keeps you legally insulated and handles the mercury retort processing properly.
Q3: My new bulb fits perfectly into the socket but doesn’t zap insects. The old one did. Why?
A3: You fell for the classic retail trap and bought a Black Light Blue (BLB) bulb instead of a true bug-hunting Black Light (BL) tube. Sure, they look identical in shape and both use the same bi-pin socket, but look closer at the glass. If the tube has a dark purple, almost opaque filter coating, that’s a BLB lamp designed for stage lighting or checking counterfeit dollar bills. It blocks the exact wavelength flying insects use for navigation. Bugs don’t care about a purple party glow; they want the unfiltered 365nm peak output of a clear or milky BL bulb. Check the stamp on the glass cap—if it doesn’t say “/BL”, your pest control strategy is dead in the water.
Q4: How often should we clean the high-voltage grid surrounding the bulb?
A4: Don’t wait for a scheduled quarterly inspection if you’re running a high-volume logistics hub or a food packing plant. When insects strike the grid, they leave behind carbonized crust, fat deposits, and wing fragments. This gunk creates a literal insulation barrier across the metal wires. Over time, this buildup causes continuous low-level electrical tracking, which tanks the grid’s voltage potential from 4,000V down to a pathetic tickle that just dazes flies instead of dropping them. Blow the grid out with compressed air weekly, or use a nylon brush after a complete lockout/tagout isolation to keep the high-voltage potential crisp and lethal.
Q5: What causes a bug zapper bulb to burn out in less than three months?
A5: If your lamps are dying early, stop blaming the bulb manufacturer and look at your structural environment. Ninety percent of early filament failures on commercial floors stem from heavy physical vibrations—like mounting a zapper directly onto an uninsulated beam right next to a massive HVAC compressor or an automated conveyor line. Constant shaking snaps the hot, fragile tungsten cathodes inside the glass. The second culprit is a hidden vampire: cheap, unbranded ballasts running at over-driven milliamps that cook the lamp’s internal chemistry. If your mounting site shakes, isolate it with rubber dampening pads, or switch to heavy-duty, vibration-rated lamps designed to absorb plant-floor shocks.